Tuesday, 31 May 2011
Change of Plans
My brother and I have decided that it is unrealistic that we finish the entire Animation/ narrative. This is a great shame, as there are only two of us who are both concept artists and 3D technical artists we lack sufficient knowledge in as far as Rigging and Blend shapes and the painting of weights. The character has been a major problem in the pipeline and we have are behind in schedule as a consequence. We have thus decided that we will attempt to produce a short clip/ intro of our intended narrative of a duration of roughly 30 seconds.
Card Toss: Animating
This scene was particularly tricky to animate. I remember how difficult it was to animate the hands on the moom rig. Its the fact that all the fingers behave independently yet some have influence over others. I didn't want to go with realistic hand animation, but even if I wanted to this was not possible. Unfortunately the individual key-able connections had been overwritten when Andy was rigging the hands. This was unfortunate but it was too late to fix the hands so I decided to go ahead with the animation. I didn't want to wait around. I do not blame Andy, the work he did on the rig was superb and enough for what we wanted and I think there is a way around this small problem. After all Andy would not call himself a rigger as this is not exactly his specialism. If I am clever with the use of camera angles and poses I should be able to hide or at least disguise the problems with the rig.
Environment Setup

Lighting Setup


Camera View


I wanted a close up once again so that there was a opportunity to see some animation in the hands, I also wanted the shot to be as close to the original as possible (shot08). I am not a fan of using the same shots too often and I dislike not including close ups. Close ups are a great way of introducing detail, establishing the scene or informing the viewer. There is also an element of immediacy. Although close-ups are unrealistic in reality, in cinema they work really well. Using a variety of shots demonstrates good filmic language and is more engaging to the viewer instead of having very flat camera placements. After all I want this piece to be as theatrical as possible. I thought that introducing the glass would add some detail to the scene, however I chose to remove it primarily because it looked terrible and secondly because I though it would be a distraction.
I noticed that the fingers could not be animated separately and that when animating the hand in as far as the fist attribute, the little finger seemed to be distorting and pulling the geometry of the ring finger. I tried altering the vertexes to manipulate the geometry back into shape, however when I dragged the slider along the timeline the vertexes were put back into their original positions. I have a feeling it was due to the painting of the weights, as the ring finger seemed to squash and the tip of the little finger began to elongate when I closed Frank's right hand into a fist. This was a minor problem however because I realized that you don't actually see this imperfection due to the lighting setup within the scene. The geometry that is being affected is hidden in shadow. This was fortunate, however I was not about to ask Andy to fix the hands, after all time was running out and Andy had his own film to worry about.
I would have liked to have animated the hands as realistically as possible and to have been able to animate each finger separately. However I had to accept that this animation was far from perfect due to the limitations of the rig. But I worked with what I had and made the best of it and I think I did a pretty good job. I included some slow in and slow out with some overlap as his right hand flicked and tossed the card. The most challenging aspects of this animation were the fluidity and pacing of the motion of the right hand and to get the behavior of the hand as believable as possible. In the end I thought that it would be best to keep things subtle and simple. I also added some nuances to the left hand which I was most proud of. I had to parent the deck of cards with the left wrist joint and the card that was to be thrown was parented with the right wrist joint. At first I was unsure of how to animate the props in conjunction with the hands, but I remembered the process of parenting and it worked perfectly.
The original Storyboard.
Joe Steele: Compositing
Joe has been making progress in as far as the composites for the shots I gave him which were shot:02, shot:03, shot:09, shot:10, shot:16 and shot:30. When I took a look at the shots I was impressed with his efforts although it came to my attention that the shots were far too red in hue. The colour balance looked unrealistic. He explained that he did not understand why the shots were exporting really dark and red. He then thought that perhaps it was either the colour correction in his version of after effects or his laptop display settings. I ltold him to try an export them again but this time grading the sequences so that they were lighter and more orange rather than red. I suspected also that perhaps he was using the multiply layer property rather than overlay which I usually use in order to overlay the occlusion pass. Obviously it depends how the image is lit and its exposure, however multiply tends to make layers darker whereas overlay usually renders layers either transparent or brighter depending on exposure/ brightness. I told him to try overlay rather than multiply. We tested this theory and it seemed to work better than the multiply layer property.
Shot:10

My composite
(Better colour quality and more orange than red)

Joe's Composite
(Far too red)
Tara Dulake: Merging Blends with Rig
I needed someone to help with the rig. I was getting worried that we would not solve the problem before it was too late. The last thing I wanted was for Frank to have no expression in his face. I did not want him turning into a statue. I was told that Tara had experience in rigging and blend shapes so I thought that there would no harm in asking. I was just concerned that maybe she would not have enough time to help us on top of her own project.
I asked Tara if she would be willing to help out with the rig. I asked her whether she was interested in fixing our problem in as far as adding the blends/ facial expressions to Andy's rig. To my relief she said she would try and help us. I was very grateful and I gave here all the files that needed to be merged together. She said that she should have it ready in a couple of days.
Clym Smith: Merging Blends with Rig
I gave the rig to Clym as he said he could help us try and connect the blend shape/ facial expression on to the character skeleton. He did it that evening, however the blends were not working on the character with the skeleton and there were issues with the wrap deformer on the clothes. Geometry was exposed in areas and when I tried to adjust the clothes and their vertices it began to lag and then Maya crashed. I was puzzled by this and I tried again, however to no success. The same thing happened. I'll need to speak to him regarding this issue and see if he knew of any solutions. I sent him an email and looked on forums online to see if there were any solutions/ tips but I couldn't find any which related to my problem.
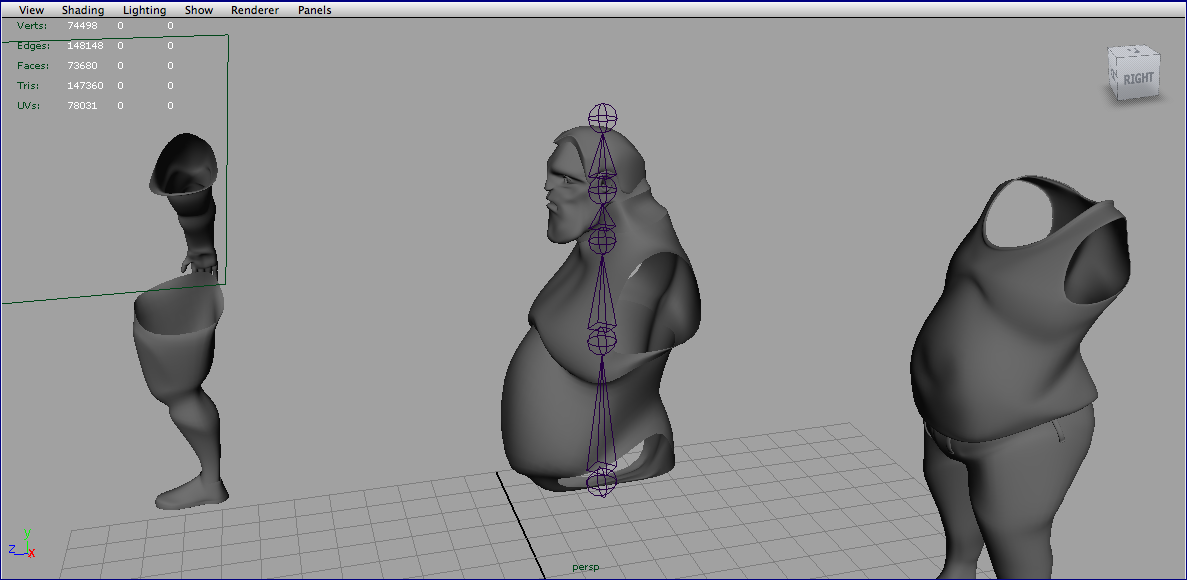
Andy's Rig
Andy confronted me and he explained that he had finished rigging our character. He explained that there were some issues and limitations to the rig such as issues with the wrists if pulled to far and that the fingers cannot be keyed individually. However I was very happy with Andy's work and I began to experiment with the rig. He had done a very good job considering rigging isn't exactly his forte. I was very grateful and he said we should contact him if there are any problems. The rig was working very well and should be just what we need in order to produce some character animation. All that we need to do now is get the blends connected to the face of this rig. It is this character stage which is putting a strain on the schedule but progress can only be made as fast as peoples capability and time they can devote to our project. I don't want to nag them too often otherwise this would just put unnecessary pressure and stress and would thus have a negative impact on the work that they would produce. After all I am not working with professionals who are proficient in a single specialism. The last thing I want is for people like Andy to rush their work and end up with a poor quality rig. If you want it done properly you need to give that little bit extra time in order get it just right. I dont want to be animating a poor rig and I don't want to produce some rubbish.

Andy Kinnear's Character Rig Complete with bones/joints, handles and painted weights.
Josh Griffin: Finished Blend Shapes

Josh Meeting
I met up with Josh and both Alex and I explained what we were looking for in as far as Frank's facial expressions. We stated that his expressions had to depict a certain mood which was along the lines of somber, concern and regret. We explained that we were looking for subtle expressions which were more realistic rather than super exaggerated. Josh got an idea of what we were after and he seemed very optimistic that he could deliver. We said that we needed the blends done as soon as possible and we said we would like the blends done in 4-5 days. Josh was confident that he could complete the blends in a couple of days. I was very excited by this news.
Josh Griffin: Blend Shapes
I tried to see if Clym was by some miracle, available to help us with blend shapes. However he was still too busy.
I remembered that a Josh Griffin from the first year was also interested in helping us out with our film. Dan also suggested that I get in touch as soon as possible as I was told that he is reliable. This sounded promising. I could really use someone who is keen, committed and reliable. I had his business card and I contacted him by sending him an email. To my relief he replied and said that he would be happy to assist us with the blend shapes. He explained that he was just starting out with blend shapes and was willing to learn. We both agreed to have a meeting the following week to discuss the blend shapes.
Andy Rigging Progress
Andy has said that he is making headway with the rig. He has said that he was finding the Spine and the hands the hardest to rig. He said that he is finding the model very easy to work with due to the fact that it is well made, the geometry is well laid out and the UV mapping is sufficient. He has had to do a few tweak the model here and there without altering the UV's. The character model is also pretty much the same as our original model. He has said that he will need to smooth the character and add new geometry/ resolution in order to effectively paint the weights.
Blend Shapes
I am concerned about the progress with our blend shapes, neither I or Andy have a clue about Blend shapes. I could try and learn blend shapes but as we are running out of time I need someone who is proficient in this area. I have asked Clym for help, but he has told me he is still too busy.
Andy's Steps In
Andy Kinnear took a look at my rigging progress. He thought that I was making progress and my knowledge had improved regarding rigging. However he stated that there were issues and that the way that I had rigged and separated the geometry without painting weights was not ideal, and that there would be weird popping actions during animation and that the gaps between joints would be visible when rendered. Andy was kind enough to take the character model and said that he would be happy to rig the character for us. He may not be as proficient at rigging as Clym, however, I have seen his rigs from the past and I trust Andy. I am sure he will do a great job and help us out. I was very grateful as we really need this rig sorted. He said that he could complete the rig in roughly a week. So I agreed that we should keep in contact via Facebook or Skype to discuss any problems and progress.
Rigging
Although we are making progress in rendering shots out and preparing the still shots for the final animation, I am worried about the progress with our character. It needs to be rigged. I had a meeting today and Dan recommended that I follow some tutorials on how to rig.
As I have currently discovered that nobody is available to Rig our character, I shall carry out Dan's suggestion and try to do the rigging myself. I shall see if I can find some rigging tutorials online or use Digital Tutors in order to learn how to do rigging. At first I was reluctant, but if we are going to get anything done, I shall need to bite the bullet and get on with it myself. It will be a challenge and I should embrace this new opportunity to learn something new and venture further from my comfort zone. The saying, you don't know till you try comes to mind. Although I do not wish to become a rigger and the idea of learning to rig is very daunting and I am not looking forward to it, but as I say I must give it a go and press on.To begin with I started by following the beginners rigging tutorial on the digital tutors site. It informed me to firstly separate the sections of geometry that were to be influenced by different bones and joints. Between each section a bone should be placed.

I then started to create the spinal column using the create joint tool. I wast sure if I should introduce a realistic curve to the spine as it is in reality or keep it straight.
I then started inserting joints into the arm and legs. I think I'm starting to understand hierarchical joints in Maya. So far I am enjoying rigging, at the moment nothing has been overly complicated. For now things seem quite simple.
Eventually I finished inserting the whole skeleton into the character model. I parented the joints with each separated component as I went, making sure that I systematically went up the hierarchy. I then mirrored the joints from the left to the right using the mirror joint tool. I had named each joint accordingly before hand to keep things clean and organised.

I then added an IK RP (rotate plane) handle solver to the arm which I could now more easily animate the arm using the IK handle. Apparently RP IK solvers are more reliable.

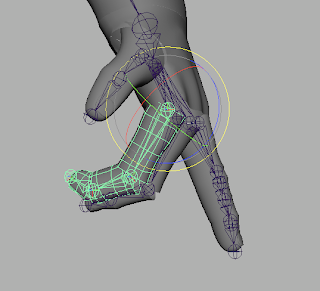
The image below shows the working hierarchy of the joints in the hand. I had to make sure that all the finger joints were subservient and parented to the wrist joint. The same principle was applied to other areas such as from the arms to the shoulders and the legs to the pelvis.
When I initially applied the IK handle on the leg, the leg would then suddenly twist out of position. I was unsure why this was happening, I was sure I had not missed out any operations. Perhaps it was something to do with the orient of the leg. I then assumed it was something to do with the attributes and that I had forgot to rest the tool. I went into the attribute box of the IK handle tool and realized I was using an SC (single chain) IK handle. I then switched back to the RP solver and this solved the issue.

I then added some additional more user friendly handles. I made these handles manually using nurbs shapes and then parenting them with the appropriate joints. This meant that the handles would make the manipulators more user friendly and easier to select and therefore easier to animate.
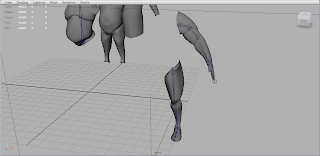
 The image below shows a working IK RP solver handle for the arm. I was very pleased that this was working so well. It has only been two days and I am making steady progress.
I then added some pole vector contstraints for the elbows and the knees to serve as locators which will in theory help prevent nasty twists, tears and deformations in the mesh.

I then created an aim constraint control for the eyes. Initially I tried to use a locator to serve as an eye control. I followed the tutorial but for some reason the connection between the locator handle and the eyes would never work. I tried again and again. I even tried restarting and it didn't solve the problem. I then got in contact with Josh and he said that I should try creating a handle manually. I tried this method and created handles for both the eyes then I parented the individual eye handles to a handle that could manipulate the eyes simultaneously. I had to add an aim constraint to both individual eye controls separately. I had basically used the same method as was shown in the tutorial, however this method of creating a handle manually worked. I still have no idea why the same method would not work on a locator.

The image below shows that the eye constraint is working. Moving the eye handle controls both eyes at the same time so they both look in the same direction.

When it came to painting weights, vertex influences and blend shapes, things became complicated. It became very difficult to understand despite the fact it was a beginners tutorial. It became rather daunting and confusing, I wanted to continue but it felt that there were areas that I had not yet covered which were relevant in order to coherently understand the excersises show in the proceeding rigging tutorials.
Calendar Scene Setup
For this setup I used the same lighting and environment layout as the clock setup. There was no need to include the rest of the environment as this would add unnecessary render time. I wanted a camera pan across the calendar from right to left originally but Joe said that we read from left to right. He had a point and I decided to go with Joe's advice. This shot was purely for character development purposes and to inform the viewer that Frank dreads the next drop off.

Calendar Texture

Calendar Planar UV Mapping


Final Gather Pass
 This render took quite a while as I set the resolution extremely high. My reason for this was I wanted a pan from left to right, however this would take very long to render if rendering the pan frame by frame. I though if I render one image zoomed out but with a high resolution, in adobe after effects, we could zoom in and still have enough room to incorporate a pan. If I was render an image regularly firstly a pan would not be possible as we would have to zoom in but the image will look awful due to low resolution and pixelation. The lamp shade is also visible in the shot, but if we zoom in for the pan, this will be out of frame.
 This render took quite a while as I set the resolution extremely high. My reason for this was I wanted a pan from left to right, however this would take very long to render if rendering the pan frame by frame. I though if I render one image zoomed out but with a high resolution, in adobe after effects, we could zoom in and still have enough room to incorporate a pan. If I was render an image regularly firstly a pan would not be possible as we would have to zoom in but the image will look awful due to low resolution and pixelation. The lamp shade is also visible in the shot, but if we zoom in for the pan, this will be out of frame.
 Occlusion Pass


Composite
Joe helped us create this pan. As you can see we could zoom in and the resolution would not be affected. This composite is in my opinion still a little too warm in colour. We may need to adjust the grading in after effects.

The Original Storyboard


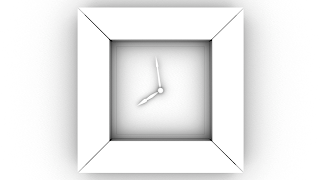
Clock: Animating
To begin with I did a very simple animation for the tick of the clock from 7:59 to 8:00 pm. It was literally a single frame from one key position to the other. I looked at the animation and I hated it, it was dull and boring. So I decided to introduce some exaggeration and character to the animation. I introduced some anticipation to the minute hand by animating a slow in and then a quick flick. I also introduced a nice flick back and overlap to give it some recoil. I was very pleased that it took very little time to produce an effective animation and I am now satisfied as it is a nicer more interesting animation, thus a more interesting shot.

Occlusion Layer


Final Gather Layer


Initially this render was ruined by the fact that the texture was very pixelated. I solved this problem by firstly recreating the texture and then increasing the texture from 1024 to 2000 pixels. This way I would increase texture resolution. I also sharpened the image in Photoshop in order to make sure that the image was crisp when applied as a texture. When I rendered the change was obvious and thus the shot had been improved.


Clock Scene (Composites)
Clock and Calendar Scene Setup
 Clock Frame Texture
 Clock Frame Bump Map
Clock Frame PLaner UV Mapping


Clock Face Texture

Clock Face Planar UV Mapping

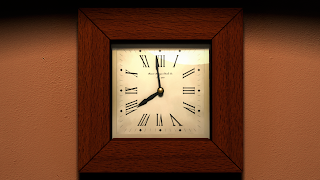
This test render below was a bit of a surprise. At first I had no idea why it looked so awful. The render was blotchy and the clock face was not illuminated enough. I also felt that the clock appeared to be top lit, which is not what I had in mind. Initially thought it was due to the position of the light. This turned out to be the case but also because the samples of the light that I was using were not high enough. I set them from a value of 8 to a value of 55. I also increased the accuracy of the final gather settings from 100 to 155. I thought that these increases in attributes would get rid of the horrible blotch areas in the render. Although this will increase render time somewhat.
 A better render but still not perfect. If anything its too bright now and there are still some blotchy areas. I tweaked some of the settings and reduced the intensity of the light. I also re introduced the lamp shade to the scene in order to create a shadow toward the top of the clock.
Much better. This is the render I was most happy with. It isn't perfect but I think I can improve this render in Photoshop.

Occlusion Pass
This is the composited version with the final gather and occlusion pass merged together. The occlusion pass tends to make things darker and have more depth. I also duplicated the render image and used overlay to superimpose it over the top, this gave it an agreeable warmer tint to the glass, it also in my opinion provided a more classical mood to the overall image. I thought that the lamp reflection in the glass came out rather well and adds that much needed highlight to the glass.
 Original Storyboard
 I applied the same methods and techniques with this composite as well. These were especially exciting to see how these renders developed and how I made the transition from storyboard/ concept to a 3D shot. I am particularly proud of how these renders and composites turned out. It was doing these composites that I realised how important compositing really is and that a render that is far from perfect can be improved dramatically with some simple compositing techniques. What a difference compositing can make. With compositing unexpected yet effective finishes can be achieved.
Original Storyboard


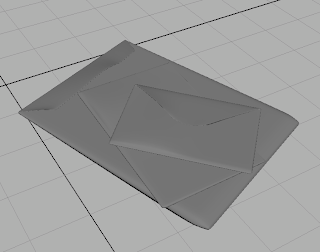
Envelopes Scene Setup
The envelope was a new idea I had which I thought would be a good idea to include as a means to not only some indication of the environment and its layout but also to tell a story. I wanted to hint to the viewer that Frank is in financial difficulty and that he is failing to pay his bills. This will help with character development and explain that he is stuck in this horrendous business and that this is the way he makes a living. This was in my mind a way of adding extra detail to the film.
I am concerned that I have a lot of static camera shots however my argument is that this will save render time and still shots will be easily composited. Having an animated camera not only increases render time but also makes compositing far more difficult. If I am to get this film done these methods will ensure that the film is completed. After all, stories can still be told with still images.
Below is an image showing the envelope models stacked on top of each-other.
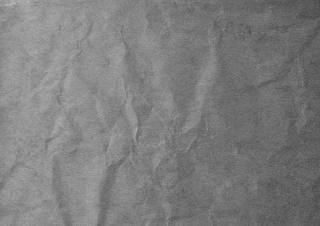
In order to make the envelopes look authentic, I looked at reference on the web and incorporated details and textures so that I create my own.
Medium Envelope Texture

Medium Envelope Bump Map
 Large Envelope Bump Map

Large Envelope Texture
 Large Envelope Bump Map
Small Envelope Texture

Small Envelope Bump Map
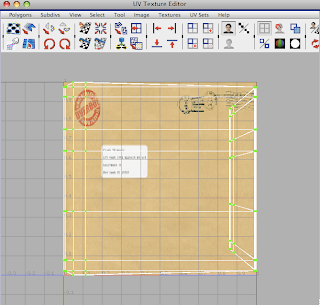
For some reason the textures were not synced correctly with the size of the envelope model despite them being planar mapped. I had to first elongate the textures on the UV texture editor and match them with with the geometry using the viewport. I had to make sure the size matched exactly so that no nasty seams were visible. I also needed to rotate the textures according to the UV's in the scene. What I should have done was to texture these envelopes in a separate scene without having rotating the models so that the axis were at 90 degrees. I had made my life a little more difficult but it was not too much of a problem.
Envelope Planar UV Mapping

Lighting Setup and Camera Placement


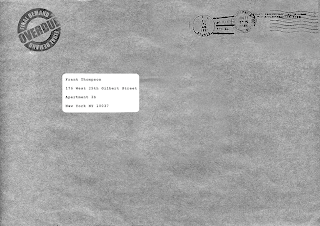
I wanted a close-up so that you could see the writing on the label and more importantly the overdue stamp on the envelope.
Camera view

Occlusion Render Pass
 Final Gather Render Pass
 Final Gather Render Pass
The wood has come out a little too dark and red here so in post I shall alter the hue of the wood itself to make it more orange.
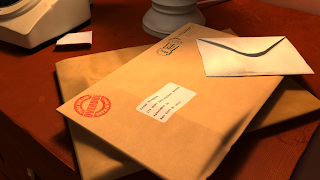

I composited the render using Photoshop and increased both brightness and contrast and tweaked the hue and colour balance of the image to make the render less dark.


I am happy that this idea made the transition to 3D so quickly. It was not too complicated to re create, after all, most of the components were already there. It was just the lighting that took a bit of work. I only used one light but it took a while to get the settings just right. I set the light to linear decay and its intensity to 5.000.
The Additional Storyboard

Subscribe to:
Posts (Atom)